
Managing Members
Go to Settings → Members (users icon) to see everyone in your workspace.
Member list
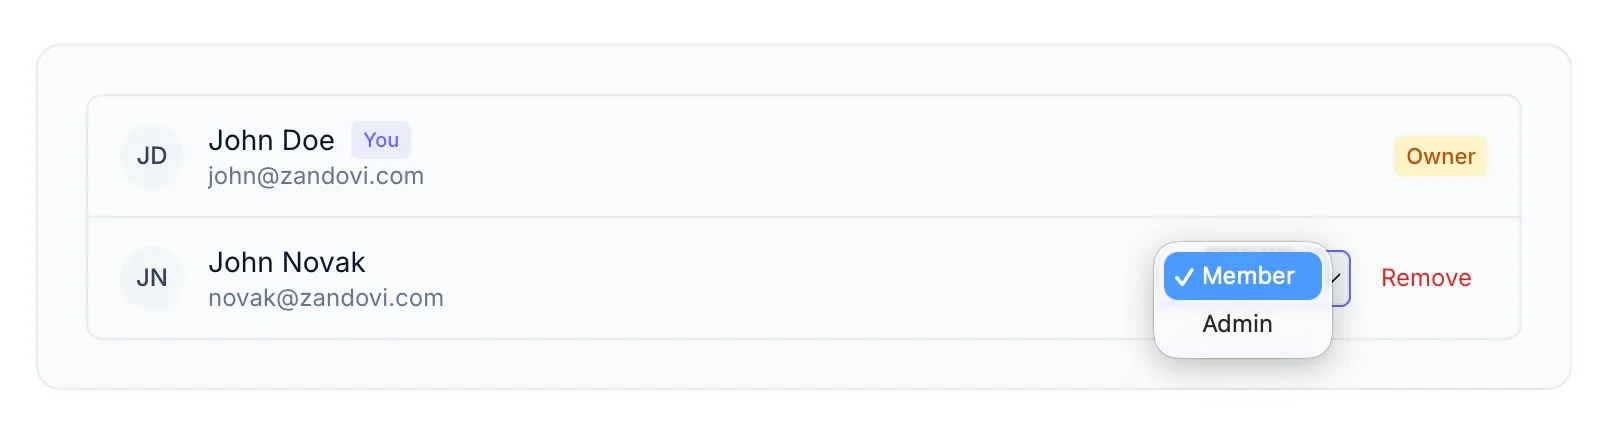
Section titled “Member list”Each row shows:
- Avatar (initials)
- Name and email address
- You label on your own row
- Role badge: OWNER, ADMIN, or MEMBER
Changing a member’s role
Section titled “Changing a member’s role”Admins and Owners can change the role of any non-owner member. Click the role dropdown on their row and select the new role. The change takes effect immediately.
Share links across the workspace
Section titled “Share links across the workspace”Owners and Admins can see and revoke every public share link in the workspace, from the Shared Links tab of the Generate dialog. Members see only the links they created themselves.
This matters when someone leaves: their links keep resolving until they expire, so an Owner or Admin should revoke anything that shouldn’t stay public.
Removing a member
Section titled “Removing a member”Click Remove on a member’s row. A confirmation dialog appears — confirm to proceed. The member loses access to all shared projects immediately.
You cannot remove yourself (the Owner) or another Owner. Use Leave to exit a workspace as a non-owner member.
Leaving a workspace
Section titled “Leaving a workspace”If you’re a Member or Admin (not the Owner) you can leave the workspace by clicking Leave on your own row. A confirmation dialog asks you to confirm. After leaving you’re redirected to your personal workspace.