Quick Start
This guide walks through the complete happy path: sign in, create a project, design a template with a variable, and download your first rendered image.
-
Sign in at zandovi.com and choose a plan (Free is fine).
-
Create a project. Click the folder icon in the left sidebar rail (tooltip: Open Project), then click New Project. Name it anything — e.g. My First Project — and click Create Project.
-
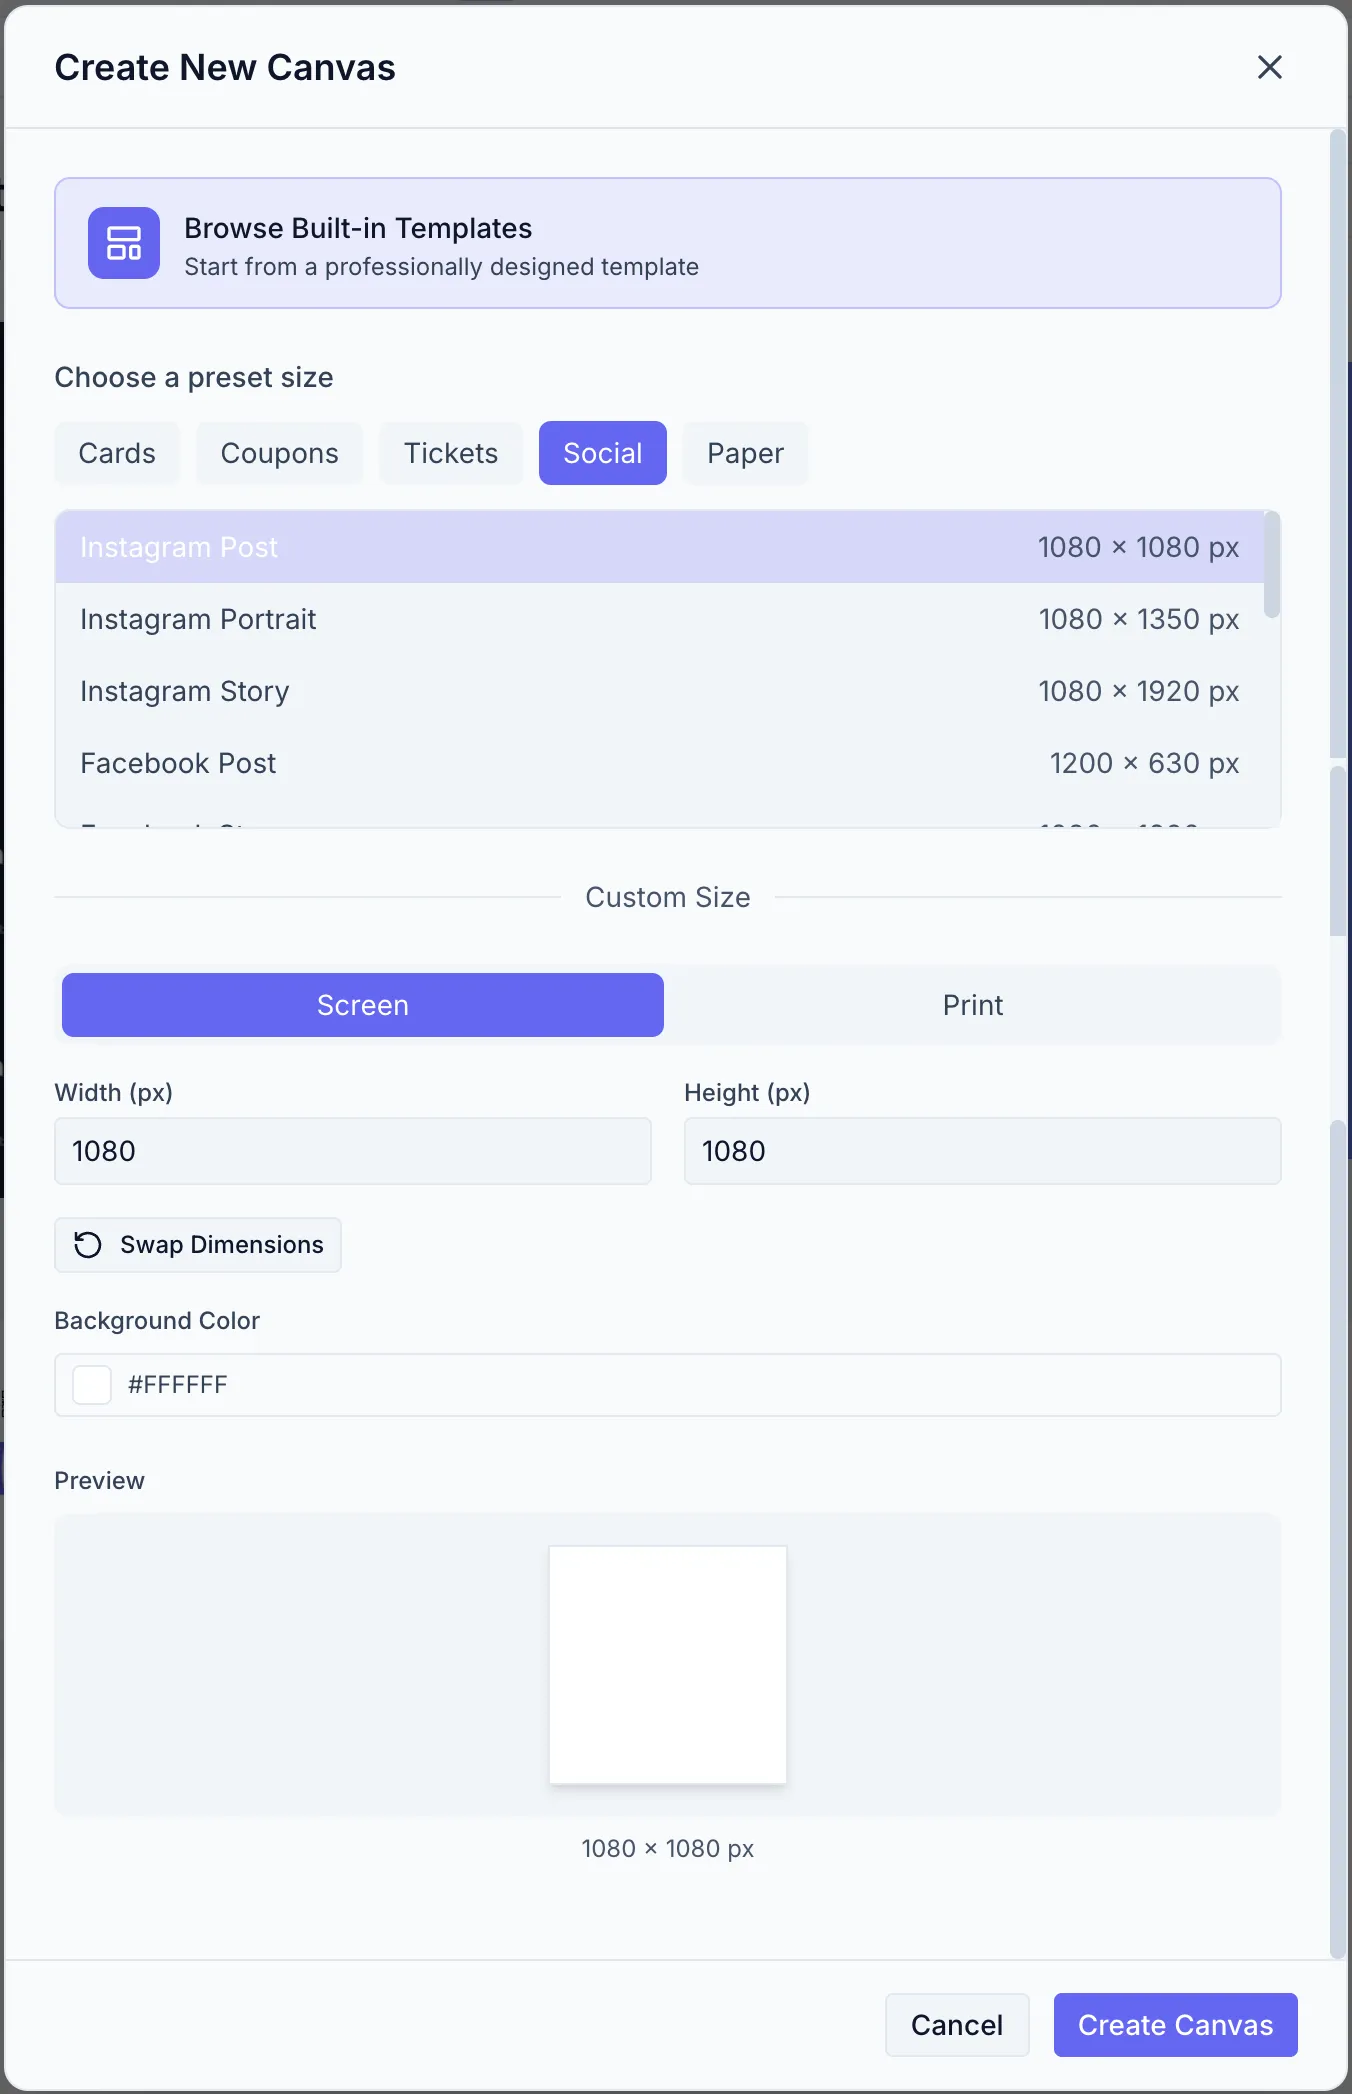
Create a new canvas. Your project opens empty. Click Create New Canvas. In the dialog choose a preset (e.g. Instagram Post · 1080 × 1080) and click Create.
-
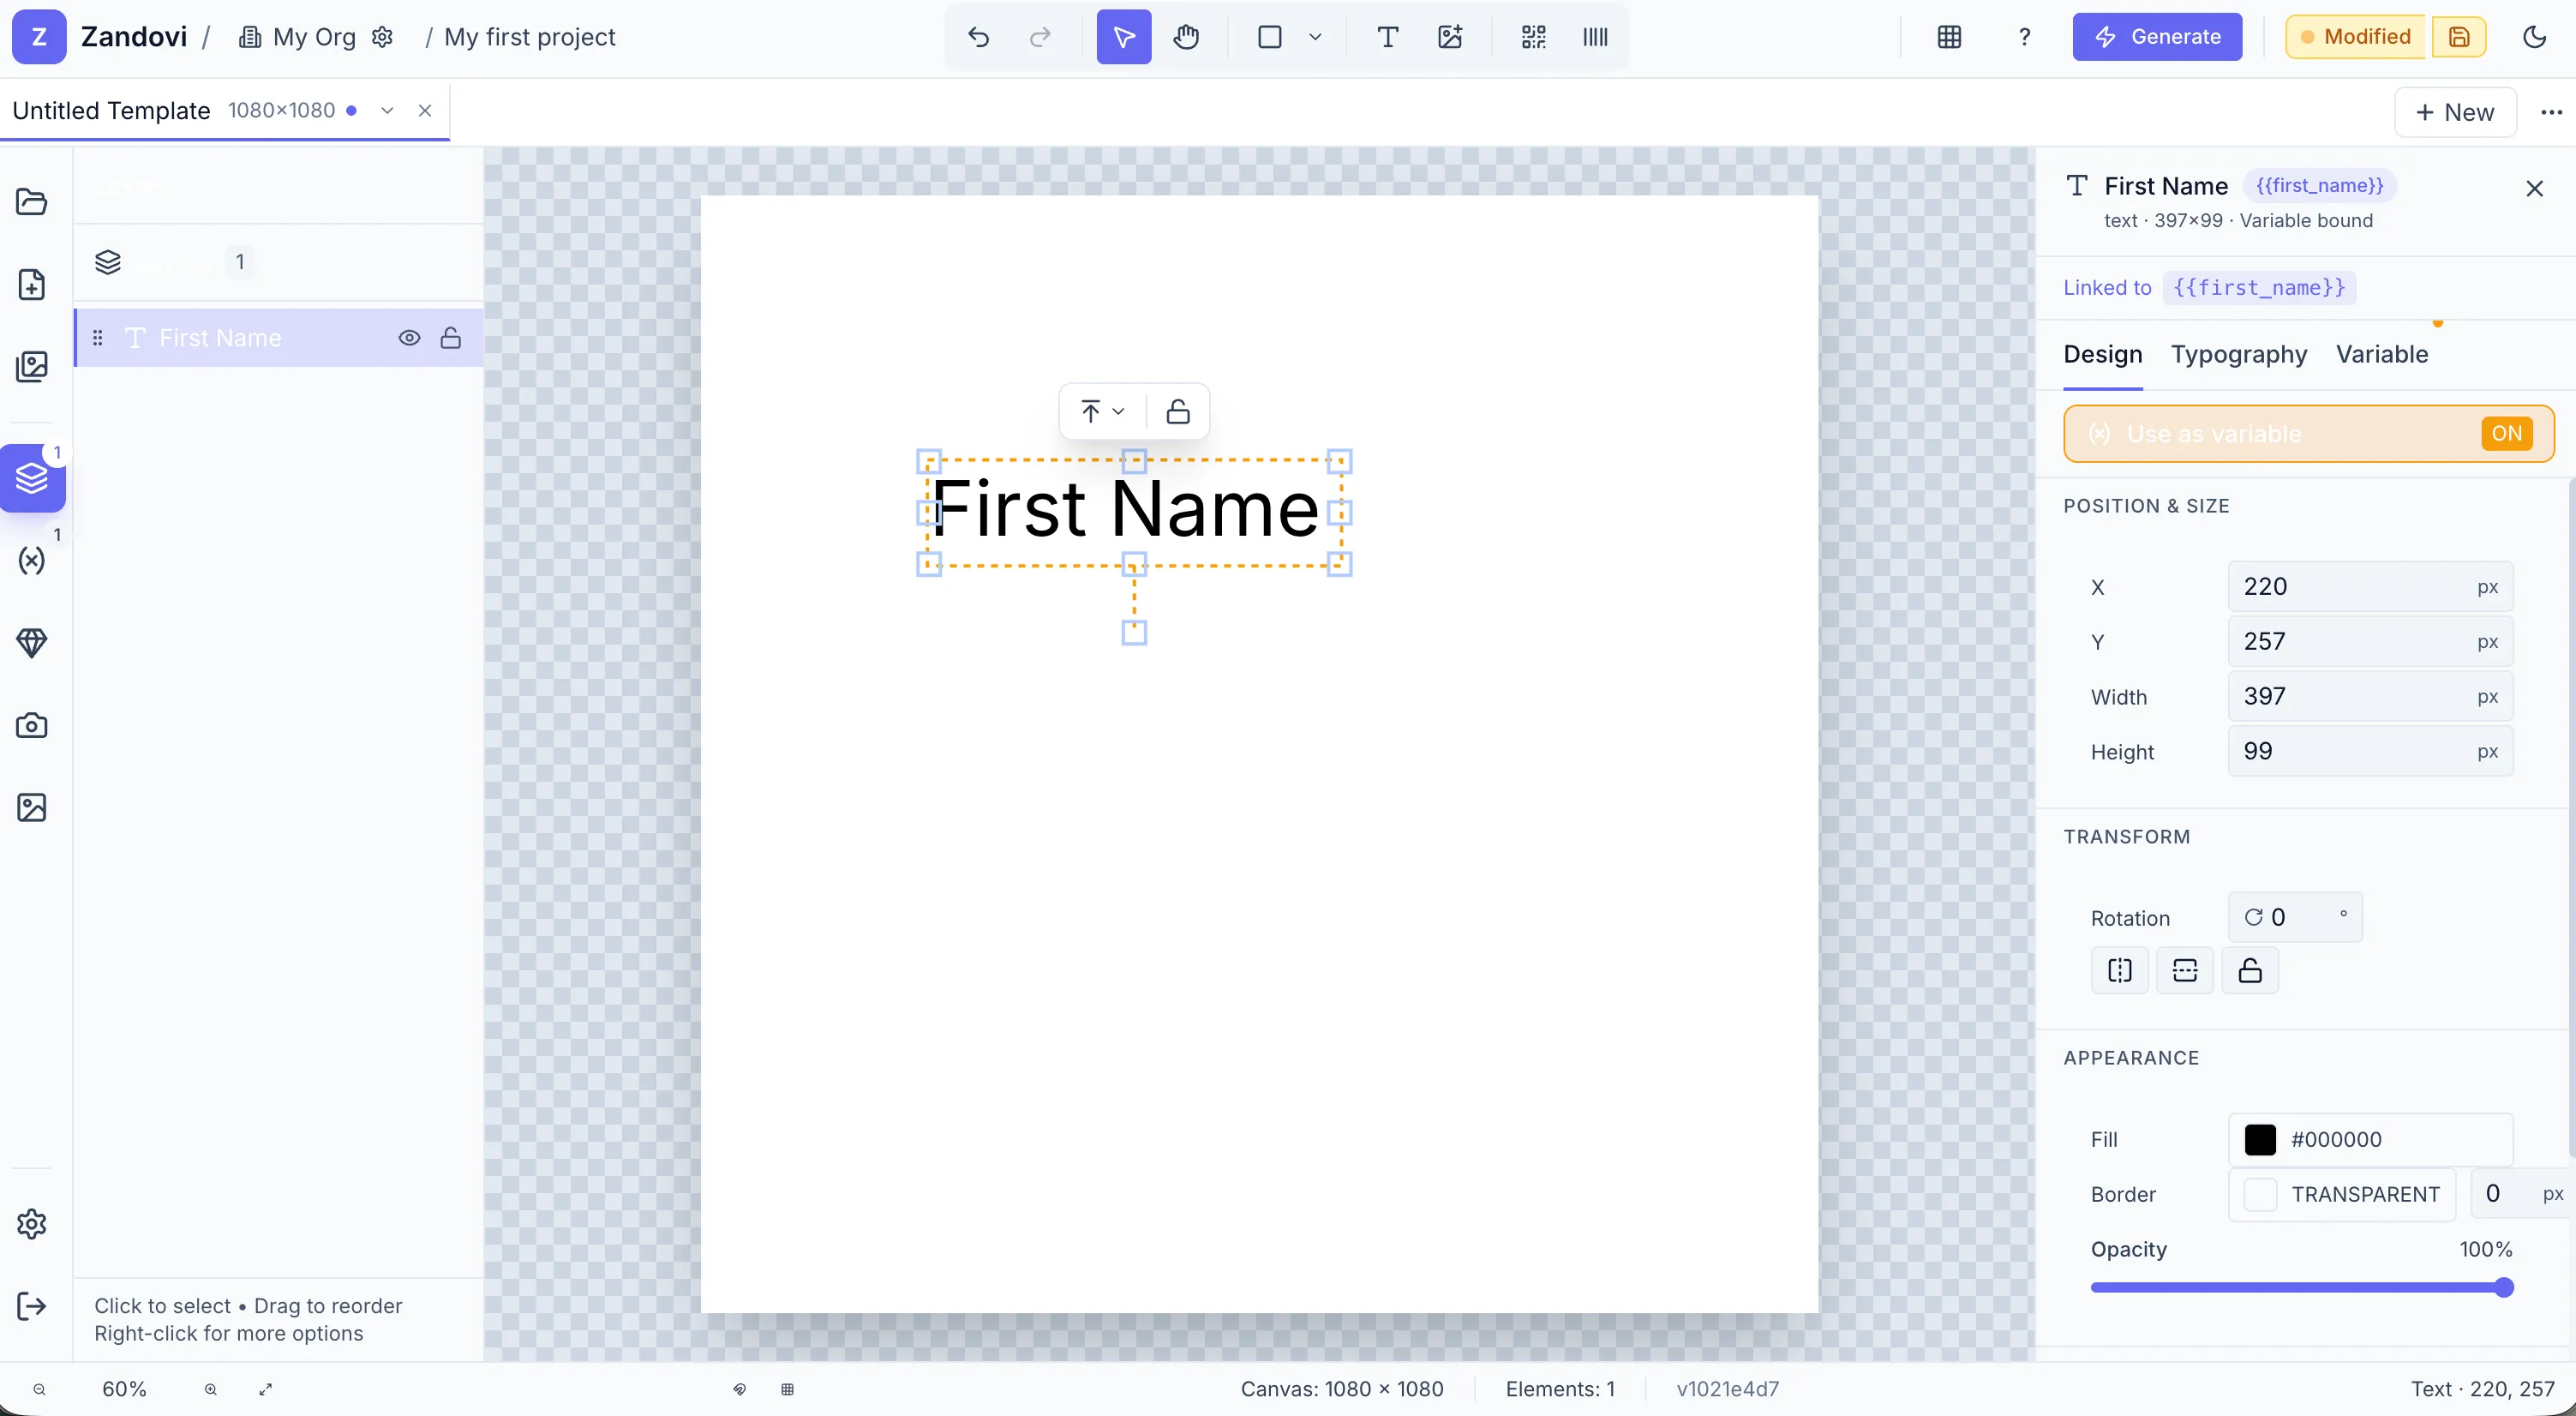
Add a text element and make it a variable. Click the Text (T) tool in the toolbar (or press
T). A text box appears on the canvas. In the Properties panel, type a sample value in the text content field — e.g.First name. Then, in the Design tab, toggle Use as variable on. Zandovi turns the whole element into a variable namedfirst_name(from your text) and keepsFirst nameas its default value. The element’s entire text is what gets replaced at render — there’s no inline placeholder to type. -
Add a shape for context. Press
Rto activate the Rectangle tool, draw a rectangle behind the text. Use the Properties panel to set a background fill color. -
Generate your image. Click the Generate button (top right, ⚡ icon). The Generate & Download dialog opens.
- Under Variables, type a name in the
first_namefield (e.g. Alex). - Click Generate Preview. Zandovi renders the image with your value substituted.
- Click Download PNG.
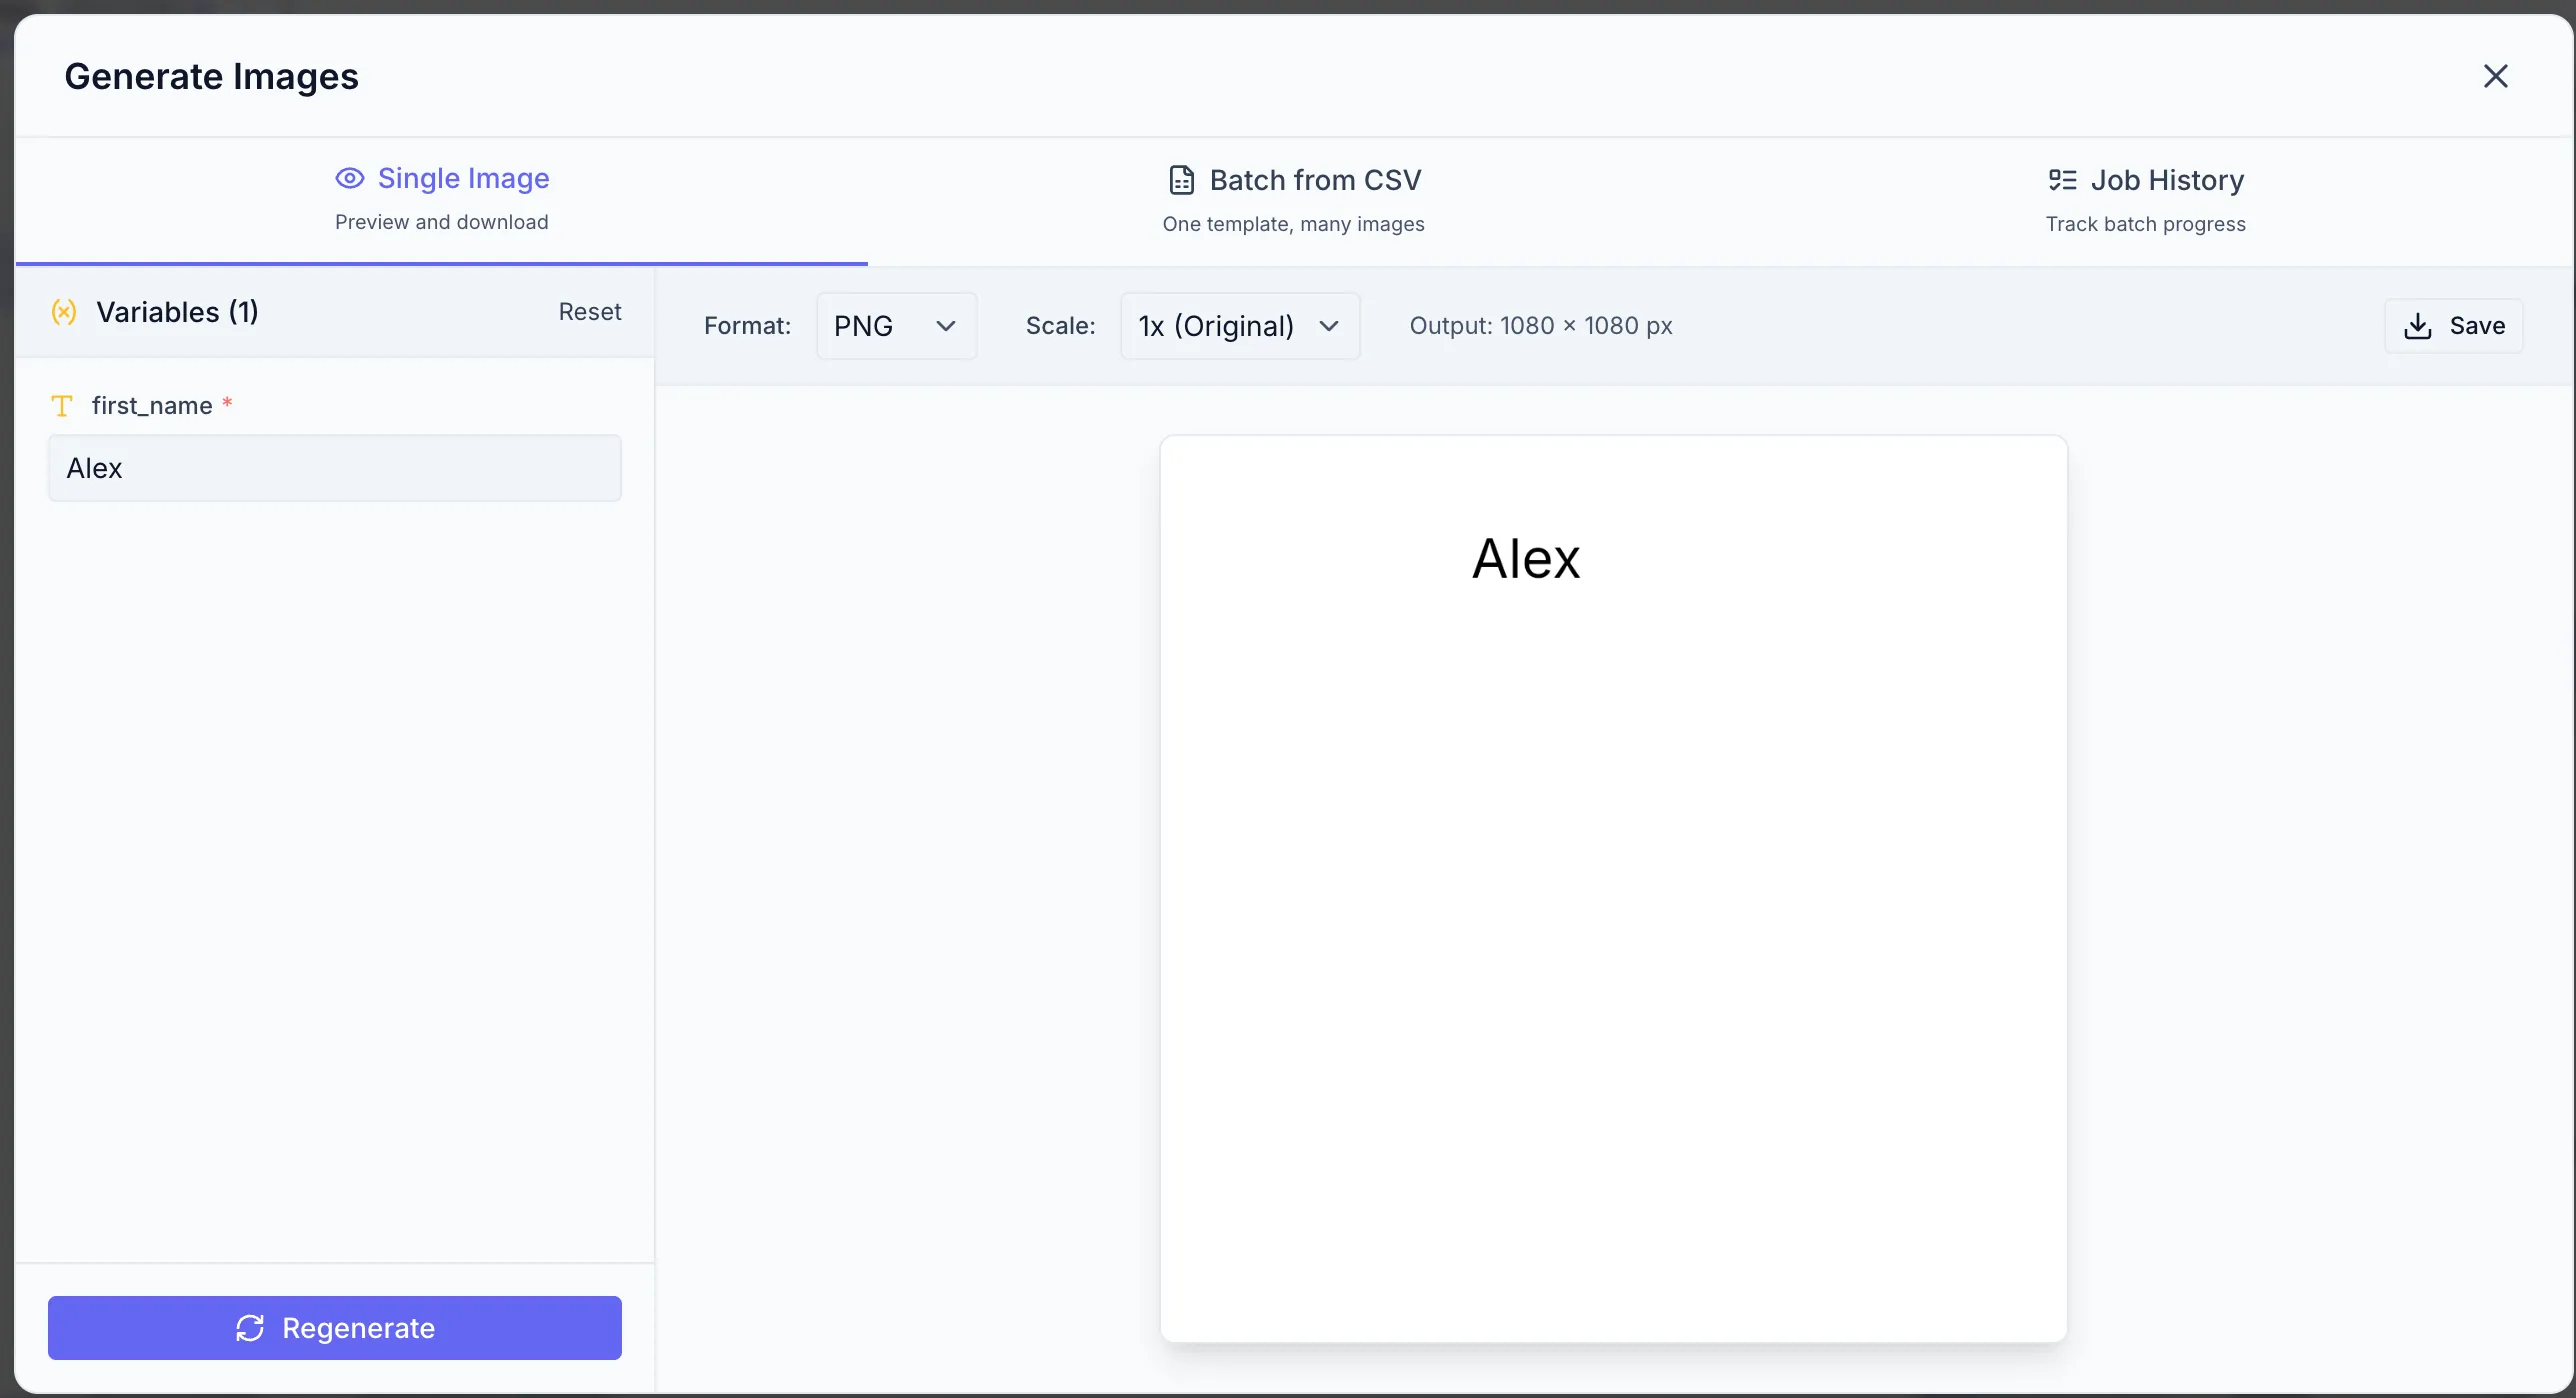
- Under Variables, type a name in the
-
Save your template. Press
⌘S(Mac) orCtrl+S(Windows). Give the template a name and click Save Template.
What’s next?
Section titled “What’s next?”- Interface Tour — learn every panel and control.
- Variables & Personalization — build templates that adapt to any data.
- Batch Generation from CSV — generate hundreds of images at once.