

Inviting Members & Roles
| Role | What they can do |
|---|---|
| Owner | Everything; transfer ownership; delete the workspace |
| Admin | Invite/remove members; change roles; manage billing; all Member actions |
| Member | View and edit shared projects; create own templates |
Sending invitations
Section titled “Sending invitations”Go to Settings → Invitations (mail icon).
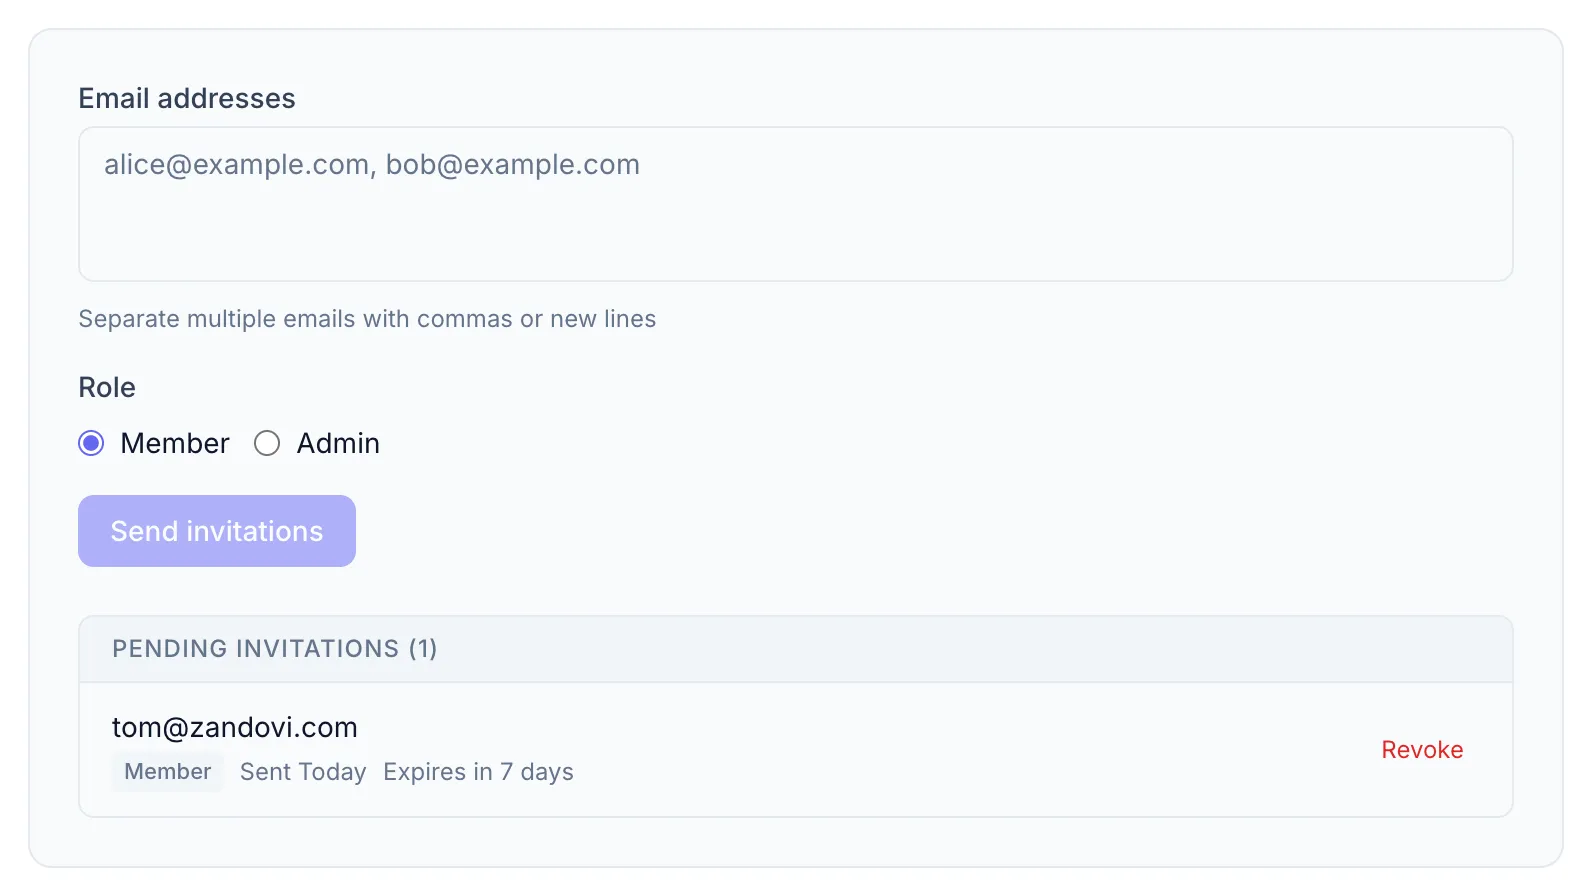
- Enter one or more email addresses in the Email addresses field (comma or newline separated).
- Select a role: Member or Admin.
- Click Send invitations.
A toast confirms how many invitations were sent: “Sent 2 invitation(s).” If any addresses are already members that’s also noted.
Pending invitations
Section titled “Pending invitations”Each pending invitation shows the recipient email, their role, when it was sent, and when it expires. Click Revoke to cancel an invitation before it’s accepted.
Accepting an invitation
Section titled “Accepting an invitation”The invitee receives an email with a link. Clicking it takes them to /invite/:token:
- If they already have a Zandovi account they’re added to the workspace immediately.
- If not, they’re prompted to register first, then added automatically.
Changing roles after joining
Section titled “Changing roles after joining”You can change a member’s role at any time from Settings → Members. See Managing Members.