

Grouping Elements
Creating a group
Section titled “Creating a group”- Select two or more elements (shift-click or marquee select).
- Press
⌘G(Mac) /Ctrl+G(Windows), or right-click and choose Group, or click the Group button in the multi-select Properties panel.
The elements are merged into a single group. In the Layers panel the group appears as a collapsible row with child rows for each member.
Working with a group
Section titled “Working with a group”- Click the group to select it as a whole; moving, resizing, or restyling then applies to all members together.
- A group is always selected as one rigid unit — there’s no “enter group” mode for editing individual members in place. To edit a single member, ungroup first (see below), make your change, then re-group if needed.
Group properties
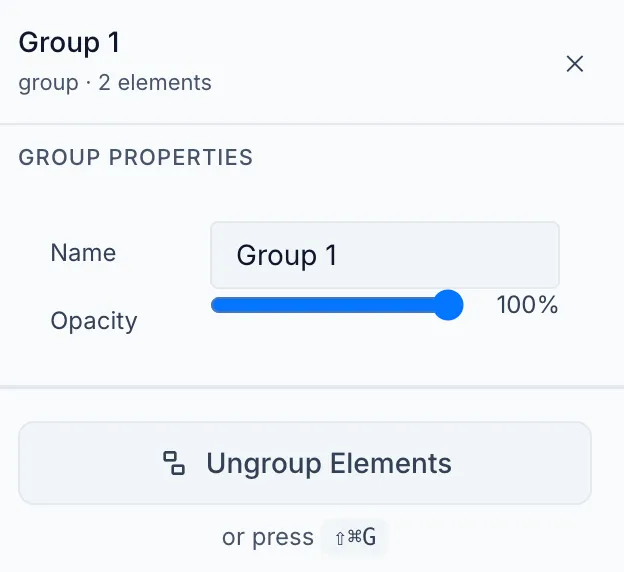
Section titled “Group properties”When a group is selected, the Properties panel shows the Group panel:
| Control | Description |
|---|---|
| Ungroup | Dissolves the group; members become independent elements |
| Opacity | Sets opacity for the entire group |
Ungrouping
Section titled “Ungrouping”Select the group and press ⇧⌘G (Mac) / Shift+Ctrl+G (Windows), or click Ungroup in the Properties panel, or right-click → Ungroup.
Groups in the Layers panel
Section titled “Groups in the Layers panel”A group row has a chevron — click it to expand/collapse and see its member elements. Clicking a member row selects the whole group. Member rows can’t be dragged to reorder them or moved out of the group from the panel; to change membership, ungroup and re-group the elements you want.