

Saving & Updating Templates
Auto-save vs manual save
Section titled “Auto-save vs manual save”Zandovi does not auto-save. Changes are tracked — the header shows a Modified badge with a pulsing dot when there are unsaved changes.

Saving a new template
Section titled “Saving a new template”Press ⌘S (Mac) or Ctrl+S (Windows), or click the save icon in the header.
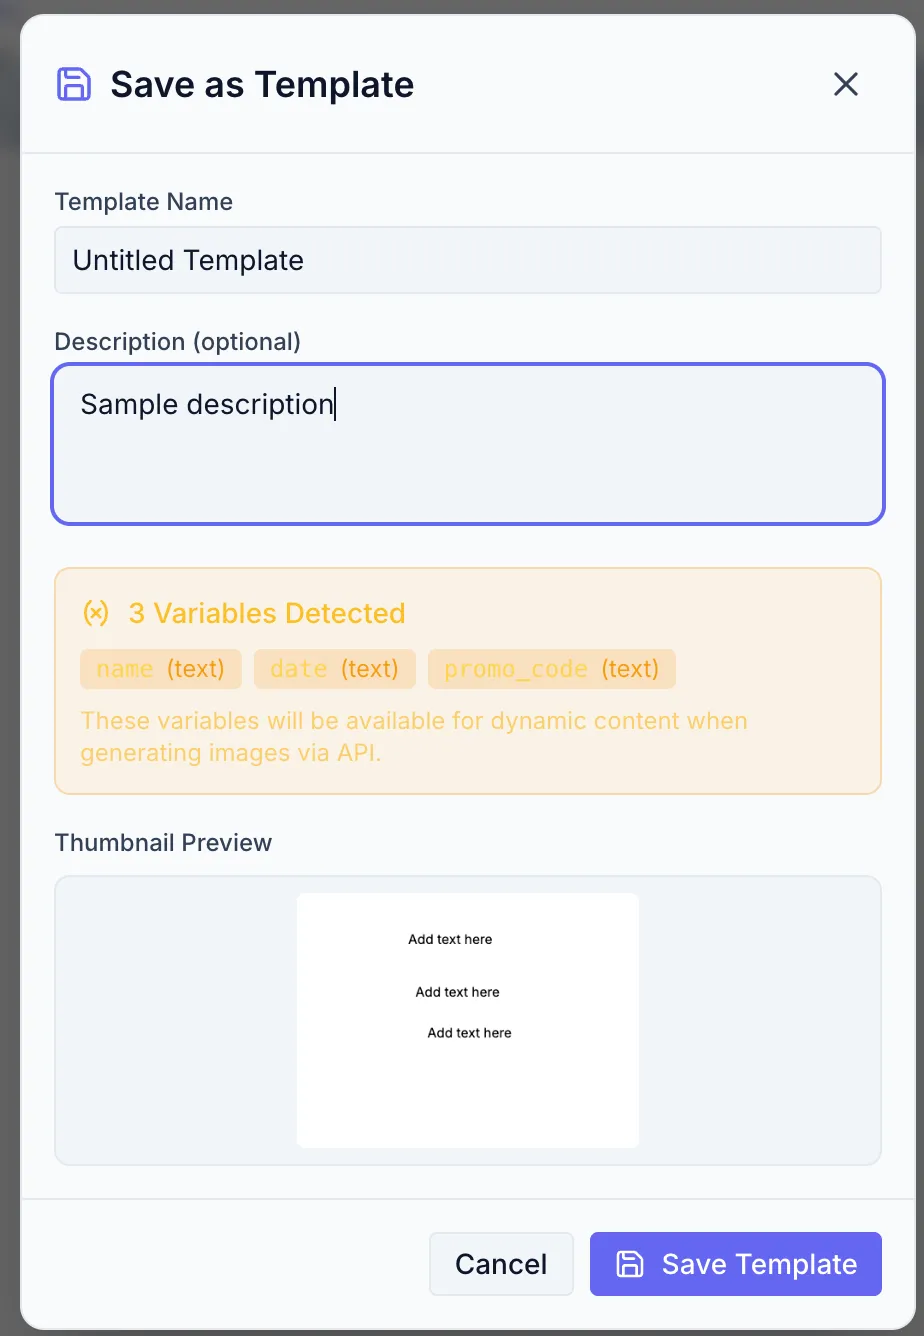
The Save as Template dialog opens:
- Enter a Template Name (required).
- Optionally add a Description.
- If your template contains variables they appear in a detected-variables panel, showing each variable’s name, type, and required status.
- A Thumbnail Preview is generated automatically.
- Click Save Template.
Updating an existing template
Section titled “Updating an existing template”After the first save, pressing ⌘S opens the Update Template dialog (same fields, button now says Update Template). Review and click Update Template to save.
Save status states
Section titled “Save status states”| State | What it means |
|---|---|
| No badge | Template is saved and up to date |
| Modified (amber) | Unsaved changes exist |
| Read only (gray) | You are viewing a template you don’t own |
Read-only templates
Section titled “Read-only templates”If you open a shared template that belongs to another user, the header shows Read only and a banner at the top of the canvas reads “Viewing shared template”. You can make edits but cannot save them back. Use Use this template to make your own editable copy. See Reusing & Copying Templates.