

Batch Generation from CSV
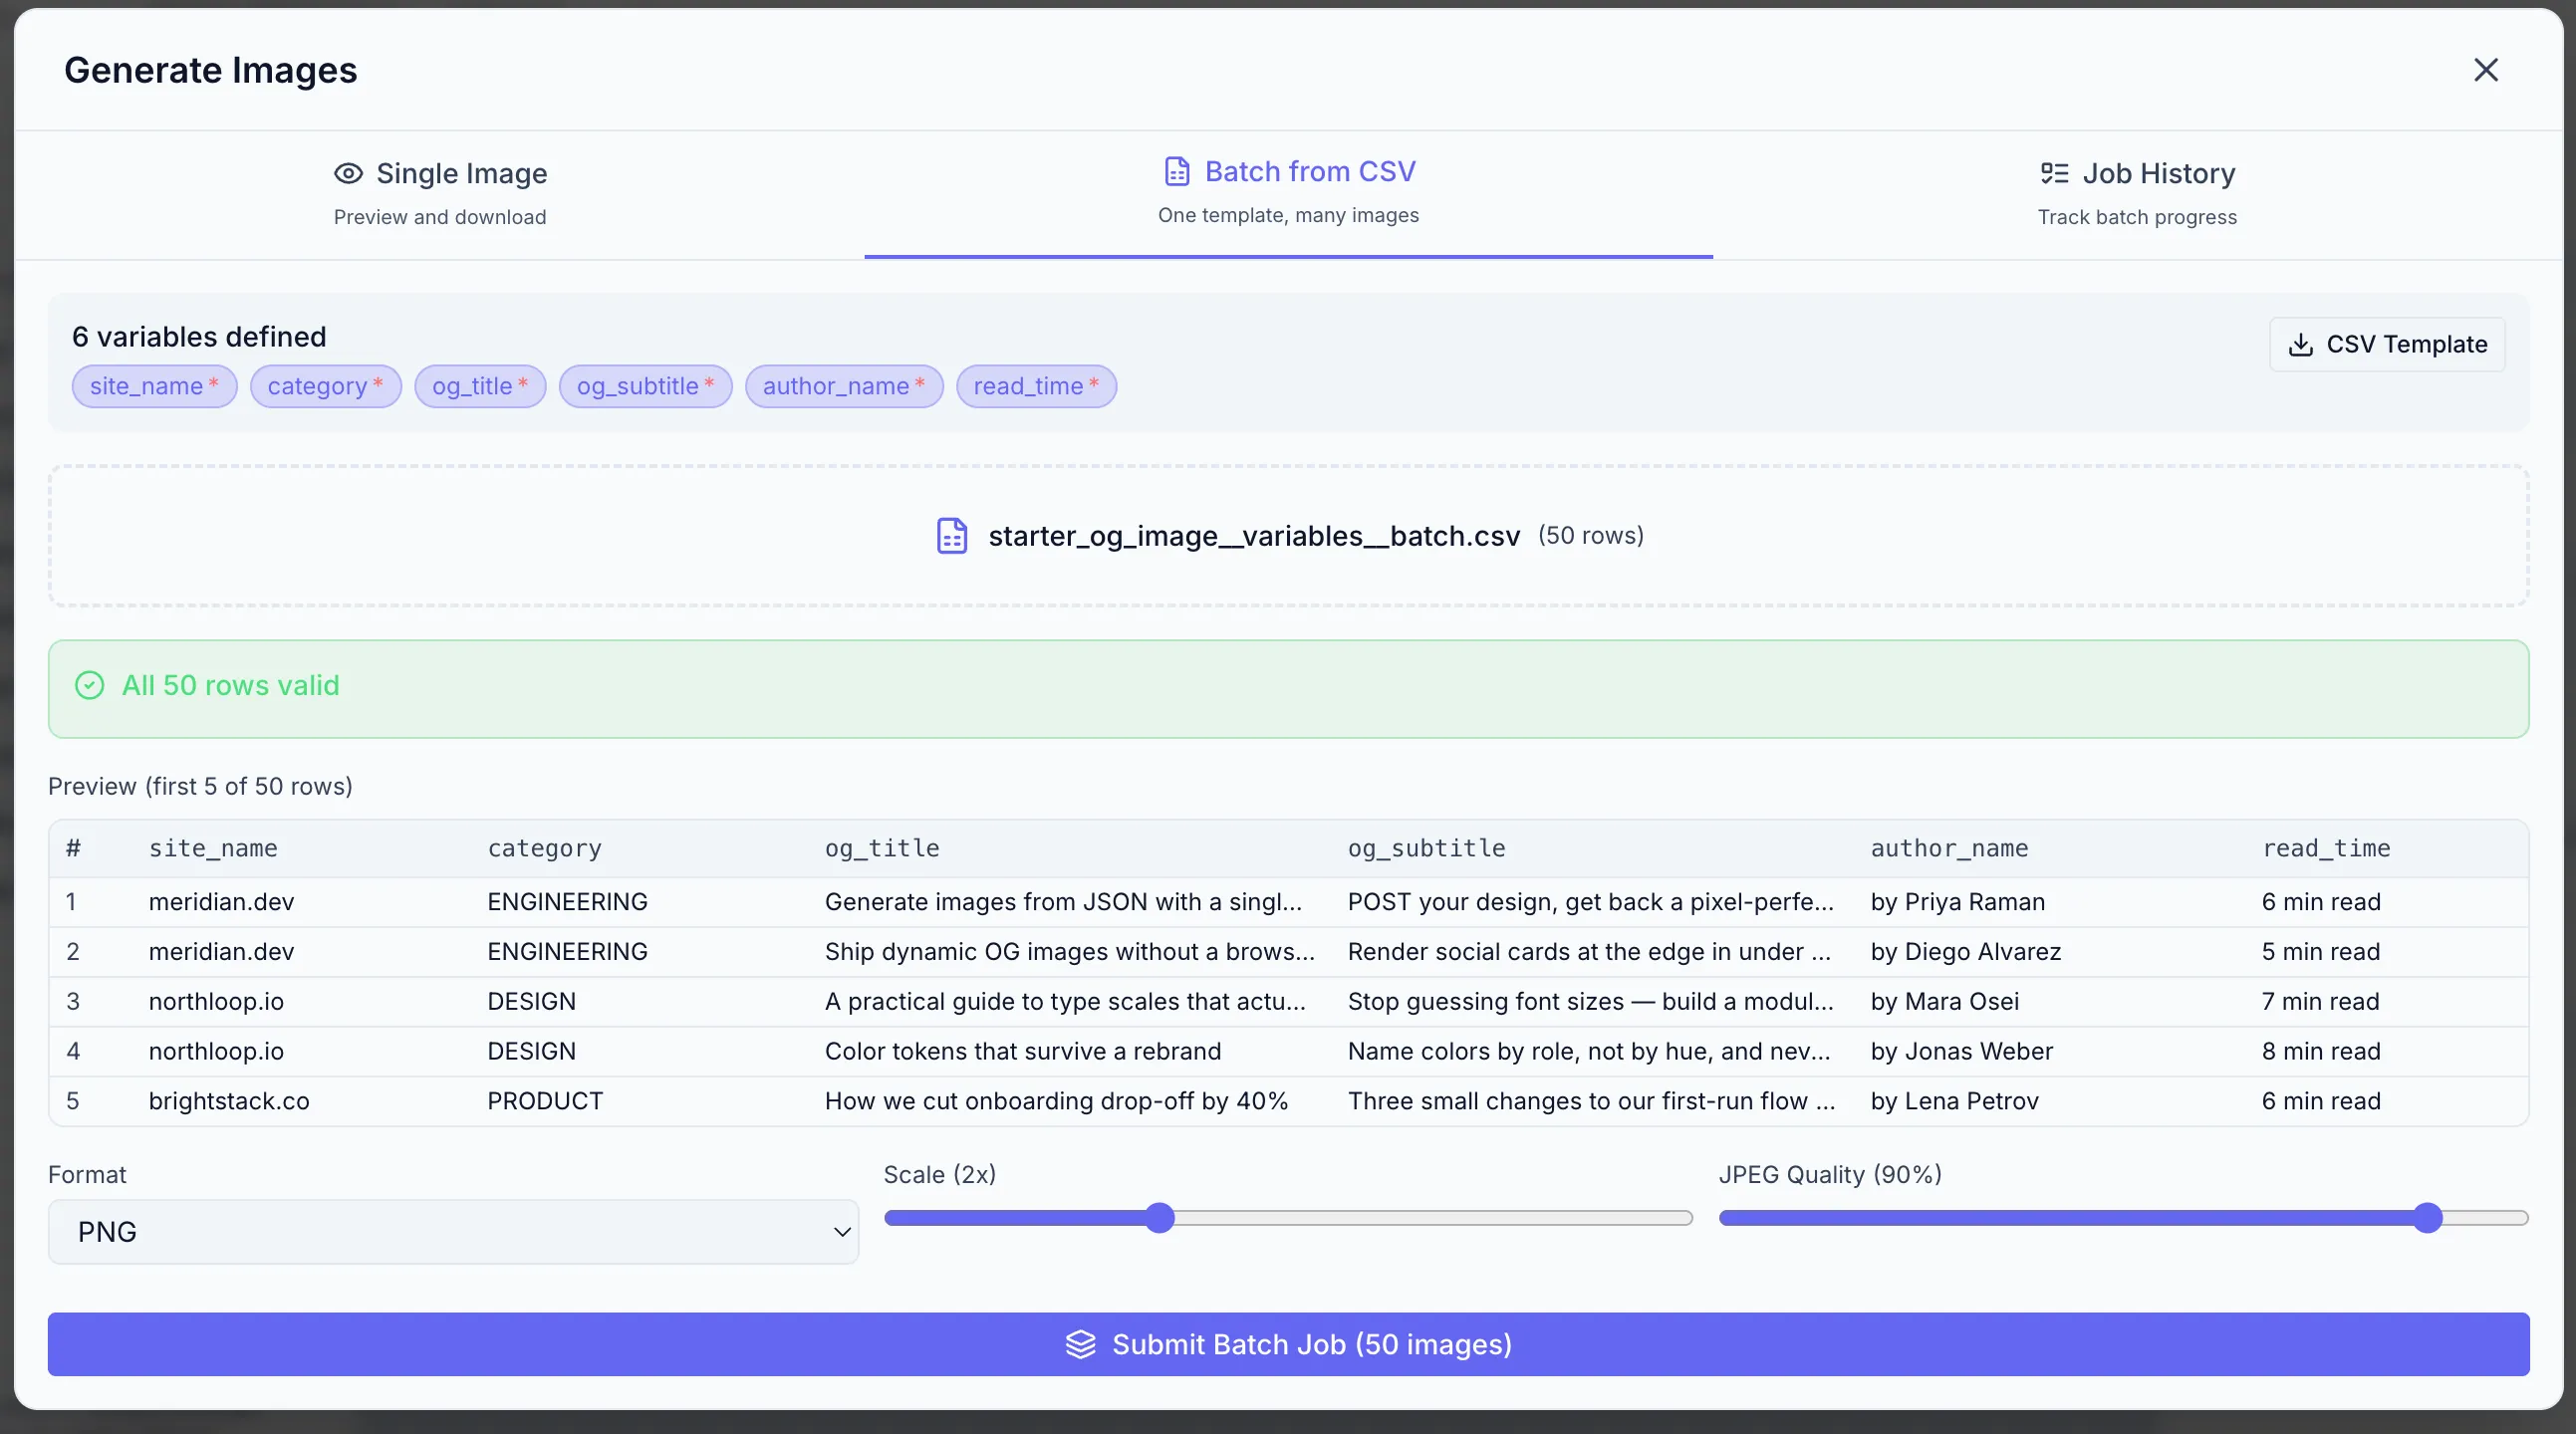
Batch generation lets you produce hundreds or thousands of personalized images in one job. You supply a CSV file where each row is one render, with columns matching your template’s variable names.
- Click Generate to open the Generate & Download modal.
- Click the Batch tab.
Step 1 — Get the CSV template
Section titled “Step 1 — Get the CSV template”Click Download CSV Template. This downloads a pre-built CSV file with the correct column headers (one header per variable in your template). Open it in a spreadsheet app and fill in your data rows.
The first row is the header — keep it unchanged. Add one row per image you want to generate.
Example CSV for a coupon template with first_name and discount_code variables:
first_name,discount_codeAlice,ALICE10Bob,BOB20Charlie,CHARLIE15Step 2 — Upload your CSV
Section titled “Step 2 — Upload your CSV”Drag your completed CSV into the upload area or click Upload CSV to browse.
Zandovi parses the file and validates each row against the template schema:
- Rows with missing required values are flagged.
- Invalid barcode/QR data formats are flagged.
Fix any errors in your spreadsheet, re-upload, and re-validate.
Step 3 — Submit the batch
Section titled “Step 3 — Submit the batch”Choose Format, Scale / Output DPI, and click Submit Batch.
Tracking batch jobs
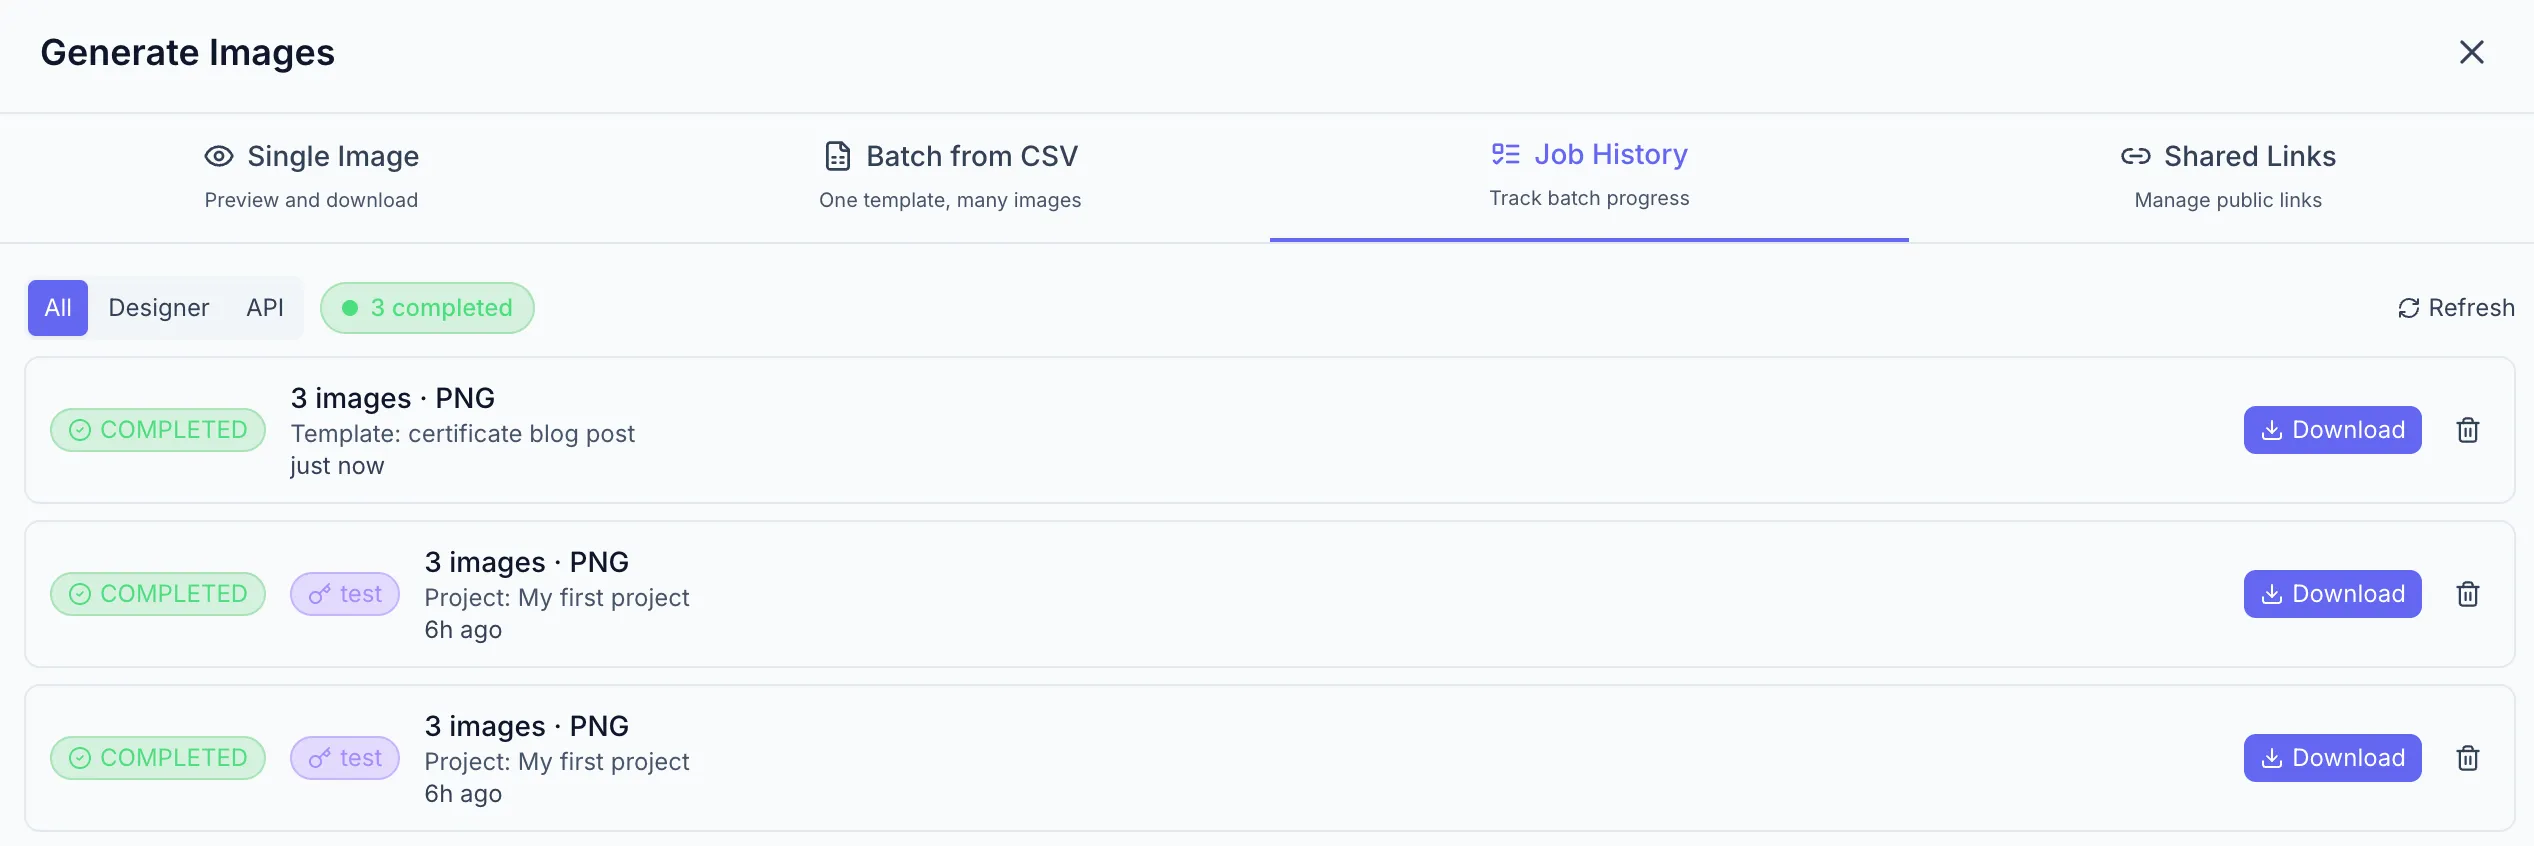
Section titled “Tracking batch jobs”After submission the job appears in the Job History tab. Each job shows:
| Column | Description |
|---|---|
| Job ID | Unique identifier |
| Status | PENDING / PROCESSING / COMPLETED / FAILED / CANCELLED |
| Rows | Number of images to generate |
| Submitted | Relative timestamp (e.g. “2m ago”) |
Counts of in-progress, completed, failed, and cancelled jobs sit above the list, and Refresh re-reads it. While any listed job is still running the list refreshes itself.
Designer jobs and API jobs in one list
Section titled “Designer jobs and API jobs in one list”Job History shows every batch you submitted, whichever way you submitted it — from this tab or with one of your API keys. The All / Designer / API filter at the top narrows the list, and your choice is remembered. Jobs submitted with a key carry a badge naming the key, so you can tell which automation produced which batch; the badge reads as a deleted key if that key has since been removed.
A colleague’s jobs never appear here, whether they came from the designer or from the API.
Long histories page in — click Load more to append the next page.
When complete
Section titled “When complete”Click Download Results on a COMPLETED job. A ZIP file downloads containing one image per CSV row, named sequentially or by a key variable.
If something fails
Section titled “If something fails”Expand a FAILED job to see which rows errored and why. The panel lists the first five failures plus a count of the rest. Correct the issues in your CSV, re-upload, and resubmit.
Deleting jobs
Section titled “Deleting jobs”The trash icon removes a job and its results.
- A running job is cancelled by deleting it, so it asks for confirmation first.
- A job submitted with an API key always asks for confirmation — deleting it destroys the result archive and the per-row outcome history that an API integration may still be reconciling against, and for a running one the prompt names the key that submitted it.
- A finished job you submitted from the designer is deleted on the first click.
Batch limits
Section titled “Batch limits”- Maximum CSV file size and maximum row count depend on your plan. See Usage & Quotas.
- A batch consumes one render per row — a 45-row job costs 45 renders from your Web Renders quota (or API Quota when submitted via the API).
Automate it with the API
Section titled “Automate it with the API”The same batch engine is available programmatically: POST /api/v1/batch-jobs takes a template ID and a rows array instead of a CSV upload, and adds idempotent retries, filename patterns, per-row result reporting, cancellation with refunds, and a completion callback so your code doesn’t have to poll. See Batch Rendering.